
Initial Configuration
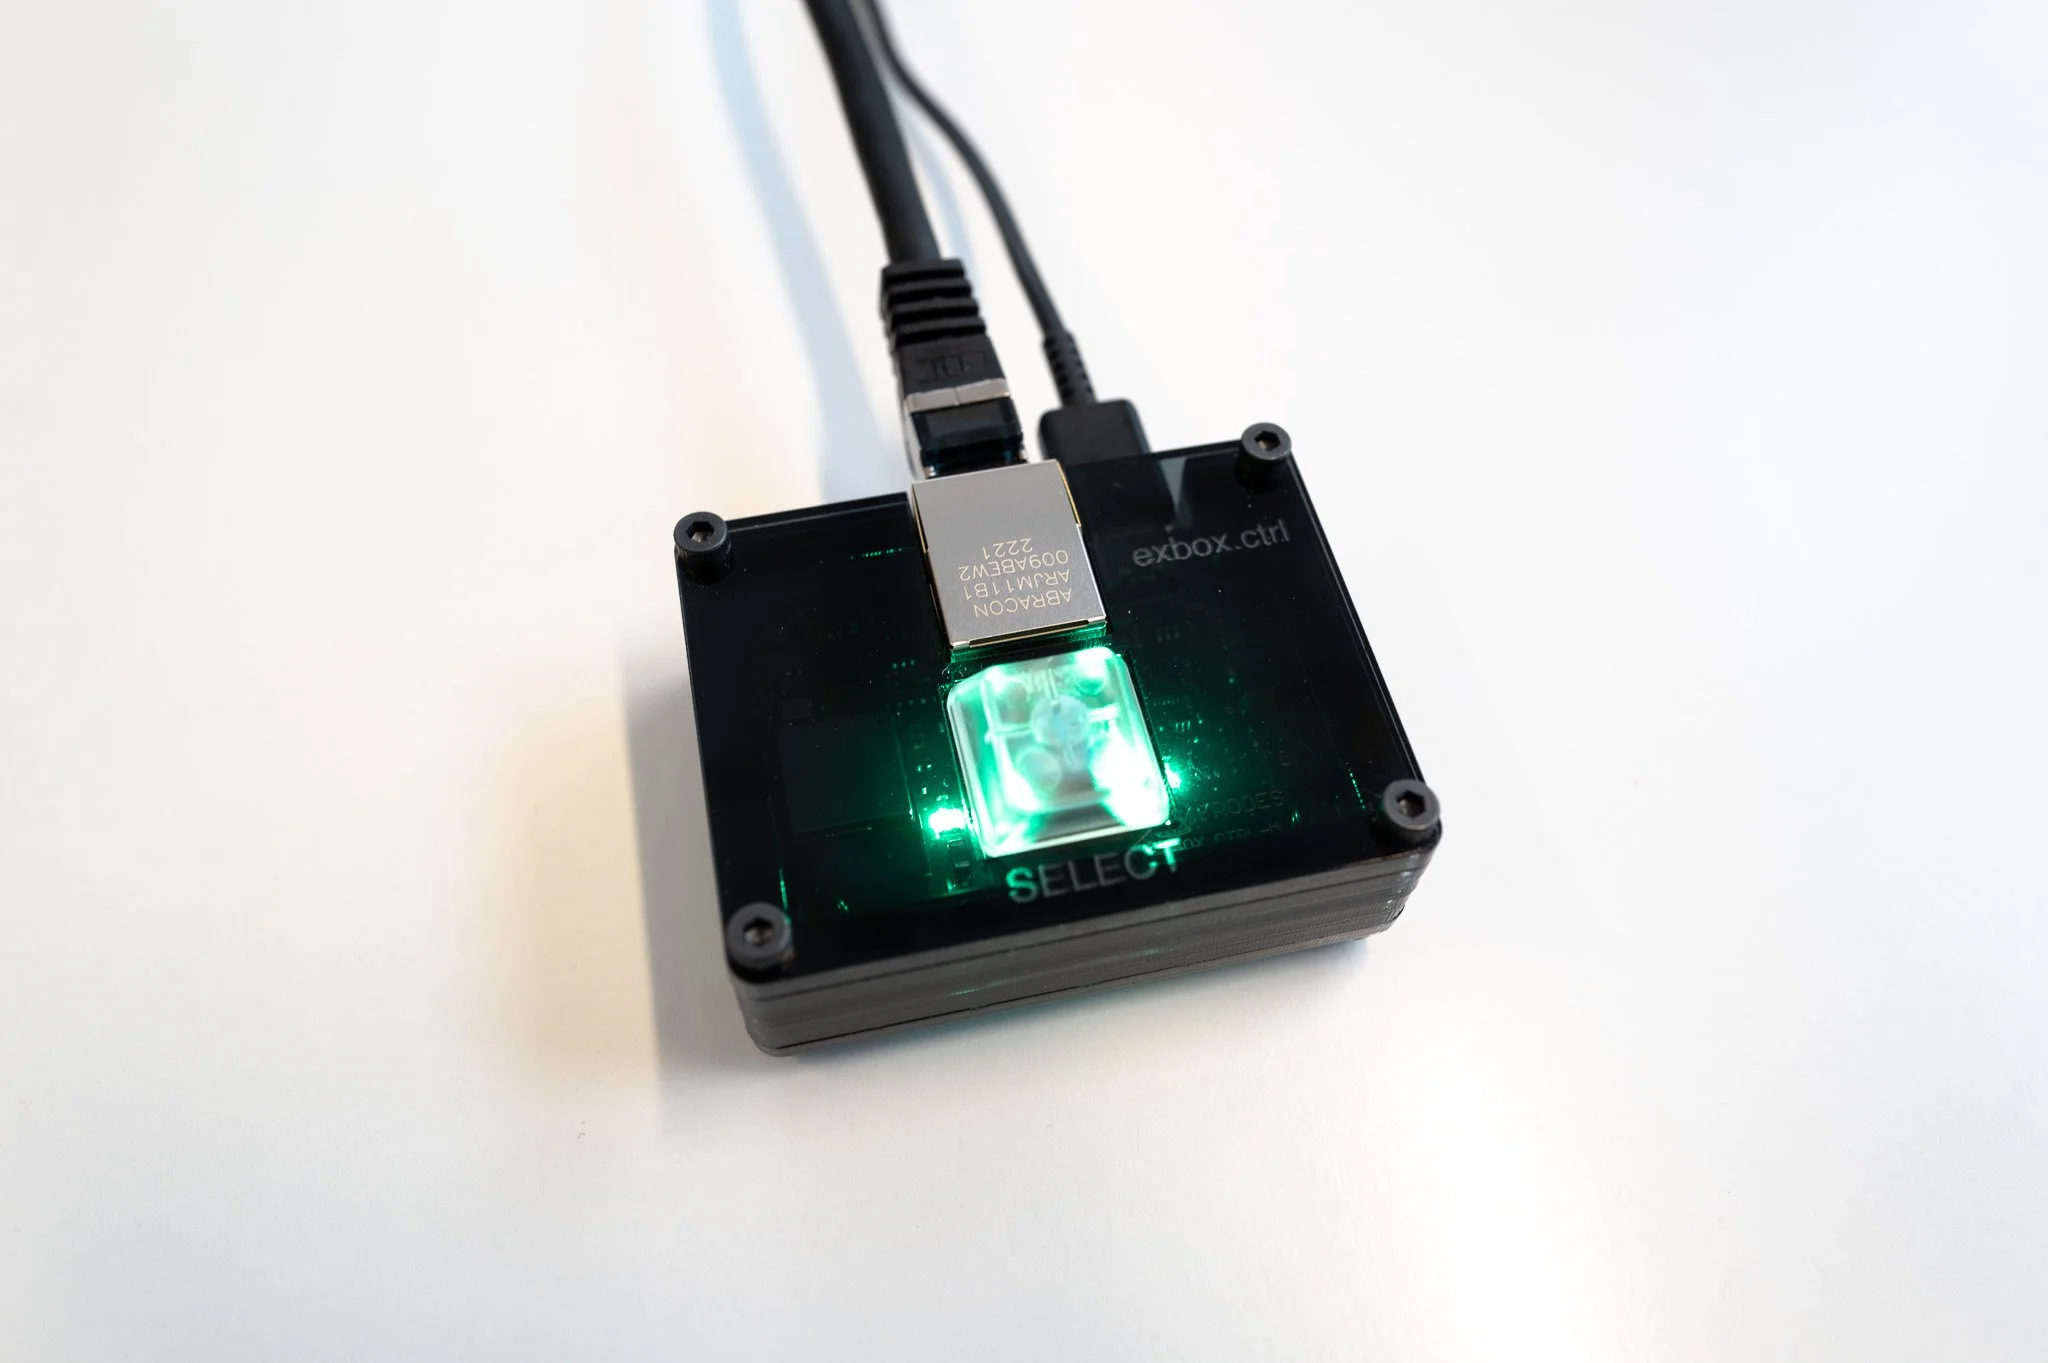
Connect Your CTRL: Use a USB-C cable to power the device. Opt for low-profile Ethernet and USB-C cables for a sleek setup.
No Connection: After being plugged in to power, the device LEDs will flash red, indicating no connection to the default target (in this case, EXBOX.MD).
WiFi Network Connection:
The device will create a WiFi network named CTRL.
Connect your computer to this network using the password ctrlpassword.
Access Configuration:
On a desktop computer, open a browser and navigate to ctrl.local to access the configuration panel.
Set Your Target:
We support all EARS modes for EXBOX.MD, EXBOX.RAV, PRODIGY.MP and ANDIAMO. Use the drop down menu to select your Target Product Type.
Plug your CTRL directly into your target or into a switch that is in the same network as your target.
Enter the target's IP address in the "Target IP Address" field. For best results, we recommend configuring your target with a static IP address so that the IP address won’t change over time (and require you to reconfigure the target).
Configuration saves automatically when you press SAVE or lose focus from the IP address field.
LED Indications:
Green: Force main selected.
Red: Force backup selected.
Blue: For PRODIGY.MP and ANDIAMO, this indicates auto mode, or no force set.
Toggle force states by pressing the button. Hold the button for 5 seconds to switch to auto mode.
Finalizing Setup:
Disconnect and forget the CTRL WiFi network to prevent unnecessary CPU usage during operation.
Troubleshooting
Connection Issues, i.e. the lights are still flashing red after setting your target:
Try re-enter the target's IP address and press enter on the keyboard, this should trigger the connection. If it works, don’t forget to press SAVE again.
For direct connections without a DHCP server, disable DHCP in the web config panel (the settings tab) and ensure the IP address matches the target’s IP range and subnet.
Unable to connect to ctrl.local or WiFi network
You can try hard resetting the device by unplugging it, holding down the button, plugging back in, waiting 20 seconds, then releasing the button. You’ll need to reconfigure, but this should resolve the issue.
Firmware Update
Connect to the CTRL WiFi network using password ctrlpassword.
Navigate to ctrl.local/update.
Select “Choose File” and upload the .bin file.
Do not navigate away from the page until the “OTA Success” message appears.
Here is the latest version of firmware. We recommend upgrading to it.
Releases
0.1.1 (tap to download)
Adds support for Prodigy.MP and ANDIAMO.
For EXBOX.MD, we’ve made it so LEDs reflect actual EARS state instead of force mode. You can select between SFP, BNC, SC, NET 64 channels, and NET 32 channels.
Adds a mDNS name field in the Settings tab that allows you to have multiple CTRLs on the same network. To achieve this, you must make sure each CTRL has a unique mDNS name. However, once the mDNS name has been update, you must use it in replace of ctrl.local when accessing the webpanel. In other words, if you change the mDNS to ctrl2, you must then use ctrl2.local when accessing the web panel.